Posts

Tutorial 07

Image
  (image of this weeks tutorial) I have finally reached the end of the Unity Tutorials with the last two tutorials being Audio and Build, Run, Distribute. For the Audio tutorial I first started by making an empty game object and adding an audio source to it. I added some looped music and set spatial blend to 2d so the sound can be heard everywhere. I then went on to one shot sound and added sound for when health is collected. I then added some spacilized sound to the robot. I then moved on to fixing attentuation by making a child gameobject to the camera and adding an audio listener to that.  The last tutorial was pretty straigh forward, I learned how to edit the player setting and set them up to how the tutorial showed me and then I built the game from the build settings. After it was built I played the .exe file and went on to try out the game I had made!
Tutorial 06

Image
(an image showing the title of the tutorial)  This week for my unity tutorials I learned about user interfaces and heads up displays as well as Dialog Raycast When learning about user interfaces and heads up displays, I first created a UI Canvas. I then learned about the rect transform which is like transform but with an ui element and I kept an overlay for the screen space. I then used the canvas scaler and set it to constant pixel size. I added an image to the ui and went to editing the ui , resizing my image, anchoring the image to the top corner. I then added a portrait and created the healbar along with its scripts. I really found this part interesting and it touched on some of the things I had to self learn for the game we are making for group project. I definitely found this insightful. For the dialof raycast tutorial I first created a new character named Jambi, who is a frog that give Ruby her mission. I then wrote up some raycasting script for when the plater is in front o...

Unity Tutorial 05

Image
  (image of one of the tutorials I followed this week) This week for my unity tutorials and in creating Ruby's Adventure I followed two more tutorials, Camera - Cinemachine and Visual Styling - Particles. For the first part I added and installed the cinemachine package to the project and then set it up. I then learned that I will be using the orthographic camera mode since the game is in 2d. I then put Ruby the main character in the follow property on the vcam inspector and made the world bigger. I then set a camera bound so that it doesn't go outside the map.  I then moved on to visually styling particles. I first prepared the sprites by slicing the sprite atlas and then I created a new smoke effect particle. I added some randomness to the particles using the size and speed constants and made them fade away with the colour gradient and size over lifetime. I made a prefab from the smoke effect and added it to the robot prefab and then fixed the smoke movement to stop when the ...

Unity Tutorial 04

Image
  This week in my unity tutorials I progressed with my Ruby's Adventure game. I delved into sprite animation and world interactions -projectiles. I was excited to learn about sprite animation and how it all works. I first started by adding an animator component, I then went on and made a new controller. I then went on to learn how to make animations from what I had in the assets folder. I learned how to change a sprite, create an animation and build the controller. I then went to the blend tree, set parameters and sent them to the animator controller and modified my script.  I then moved on to world interactions - Projectiles. I first created the projectile from the sprite named CogBullet, then I created a physics system to be able to launch the projectile. I also learned more about what the instantiate function does in Unity. I then worked on fixing a few errors and setting up my layers and Collisions. I then went ahead with fixing the robot and cleaning up the code so we don...

Unity Tutorial 03

Image
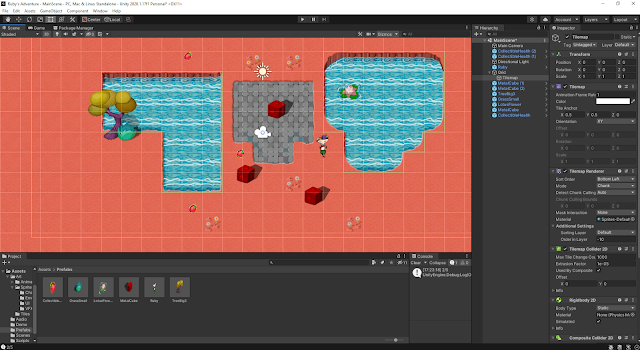
  (image from my unity editor) This week for my unity tutorials I moved on to adding collectibles and  then damage zones and enemies.  For the collectibles part I first gave Ruby a health stat and created new variables, I set Ruby's max health at 5. I then added a new sprite to act as a health collectible and gave it a box collider set as a trigger. Then I created a script for the health collectible to give health to Ruby and also adjusted Ruby's script so that it can check if Ruby needs health. If Ruby's health is at max it wont collect the health collectible. I then went ahead and added a damage zone and also took care of some of the graphics by tiling the sprites instead of stretching them so they look better. I also added enemies with rigid bodies and box colliders. I also created a new script for them called EnemyController. I then used OnCollisionEnter2D to be able to have Ruby take damage when colliding with enemies. I found these tutorials to be quite straight for...

Reading 03

Image
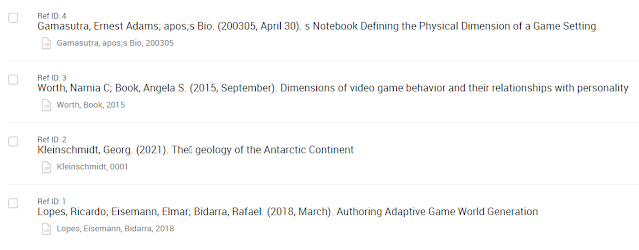
  (image taken from RefWorks of my 4 readings) This week for my reading that I had to find and select 4 academic papers on my topic, dimensions of a game world. I searched through quite a few papers and found 4 that I would focus on this week and saved them in RefWorks. I made sure to read the abstracts and conclusions so that the papers are relevant to my topic. I'm still finding it a little difficult to find some suitable papers but the ones I've found so far are similar enough to what I'm looking for. They are: Defining the Physical Dimension of a Game Setting - Ernest Adams Gamasutra Dimensions of video game behavior and their relationships with personality - Narnia C Worth, Angela S Book The Geology of Minecraft - Georg Kleinschmidt Authoring Adaptive Game World Generation - Ricardo Lopes, Elmar Eisemann and Rafael Bidarra I went through these 4 papers highlighting what I found to be important and commenting the main points I took from the papers. I then go...

Unity Tutorial 02

Image
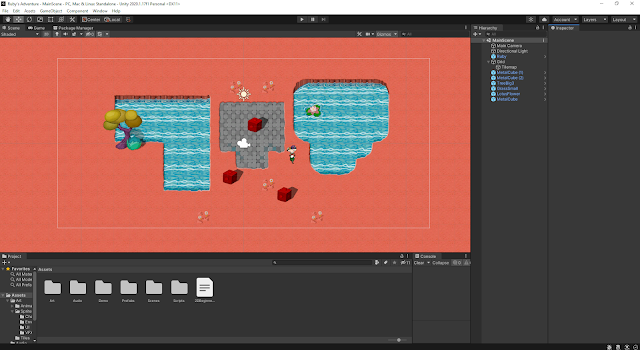
(image of my game in unity) This week for my unity tutorials I had a bit of extra work since I kinda slacked on my work last week so this week I had to catch up 😓 but overall I found the tutorials quite easy to start and go through and it was fun exploring the 2d side of Unity. I remember being interested in sprites and this type of game style a few years ago so I'm excited to learn how these game types are made and how to make my own.  Some of the things I've done so far are include setting up the unity editor to work in making a 2d game. I then went ahead and made my first character and script, character controller and keyboard input and then also worked on the world design, specifically the tile maps which i had to read over twice to get how to paint them on the map 😴 but I managed in the end.  Then I went on to decorate the world with more sprites and set colliders so that the character can interact and be blocked by certain objects.