Posts

Showing posts with the label unity tutorials

Tutorial 07

Image
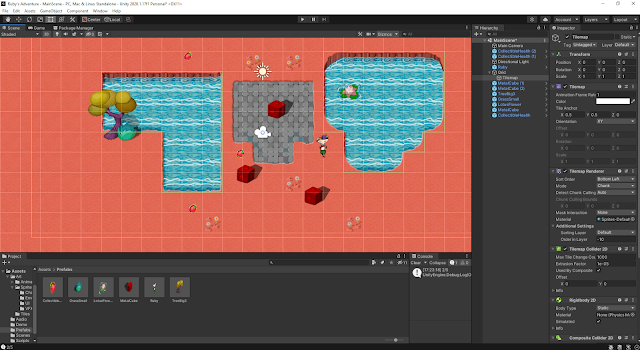
  (image of this weeks tutorial) I have finally reached the end of the Unity Tutorials with the last two tutorials being Audio and Build, Run, Distribute. For the Audio tutorial I first started by making an empty game object and adding an audio source to it. I added some looped music and set spatial blend to 2d so the sound can be heard everywhere. I then went on to one shot sound and added sound for when health is collected. I then added some spacilized sound to the robot. I then moved on to fixing attentuation by making a child gameobject to the camera and adding an audio listener to that.  The last tutorial was pretty straigh forward, I learned how to edit the player setting and set them up to how the tutorial showed me and then I built the game from the build settings. After it was built I played the .exe file and went on to try out the game I had made!
Tutorial 06

Image
(an image showing the title of the tutorial)  This week for my unity tutorials I learned about user interfaces and heads up displays as well as Dialog Raycast When learning about user interfaces and heads up displays, I first created a UI Canvas. I then learned about the rect transform which is like transform but with an ui element and I kept an overlay for the screen space. I then used the canvas scaler and set it to constant pixel size. I added an image to the ui and went to editing the ui , resizing my image, anchoring the image to the top corner. I then added a portrait and created the healbar along with its scripts. I really found this part interesting and it touched on some of the things I had to self learn for the game we are making for group project. I definitely found this insightful. For the dialof raycast tutorial I first created a new character named Jambi, who is a frog that give Ruby her mission. I then wrote up some raycasting script for when the plater is in front o...

Unity Tutorial 05

Image
  (image of one of the tutorials I followed this week) This week for my unity tutorials and in creating Ruby's Adventure I followed two more tutorials, Camera - Cinemachine and Visual Styling - Particles. For the first part I added and installed the cinemachine package to the project and then set it up. I then learned that I will be using the orthographic camera mode since the game is in 2d. I then put Ruby the main character in the follow property on the vcam inspector and made the world bigger. I then set a camera bound so that it doesn't go outside the map.  I then moved on to visually styling particles. I first prepared the sprites by slicing the sprite atlas and then I created a new smoke effect particle. I added some randomness to the particles using the size and speed constants and made them fade away with the colour gradient and size over lifetime. I made a prefab from the smoke effect and added it to the robot prefab and then fixed the smoke movement to stop when the ...

Unity Tutorial 04

Image
  This week in my unity tutorials I progressed with my Ruby's Adventure game. I delved into sprite animation and world interactions -projectiles. I was excited to learn about sprite animation and how it all works. I first started by adding an animator component, I then went on and made a new controller. I then went on to learn how to make animations from what I had in the assets folder. I learned how to change a sprite, create an animation and build the controller. I then went to the blend tree, set parameters and sent them to the animator controller and modified my script.  I then moved on to world interactions - Projectiles. I first created the projectile from the sprite named CogBullet, then I created a physics system to be able to launch the projectile. I also learned more about what the instantiate function does in Unity. I then worked on fixing a few errors and setting up my layers and Collisions. I then went ahead with fixing the robot and cleaning up the code so we don...

Unity Tutorial 03

Image
  (image from my unity editor) This week for my unity tutorials I moved on to adding collectibles and  then damage zones and enemies.  For the collectibles part I first gave Ruby a health stat and created new variables, I set Ruby's max health at 5. I then added a new sprite to act as a health collectible and gave it a box collider set as a trigger. Then I created a script for the health collectible to give health to Ruby and also adjusted Ruby's script so that it can check if Ruby needs health. If Ruby's health is at max it wont collect the health collectible. I then went ahead and added a damage zone and also took care of some of the graphics by tiling the sprites instead of stretching them so they look better. I also added enemies with rigid bodies and box colliders. I also created a new script for them called EnemyController. I then used OnCollisionEnter2D to be able to have Ruby take damage when colliding with enemies. I found these tutorials to be quite straight for...

Unity Tutorial 02

Image
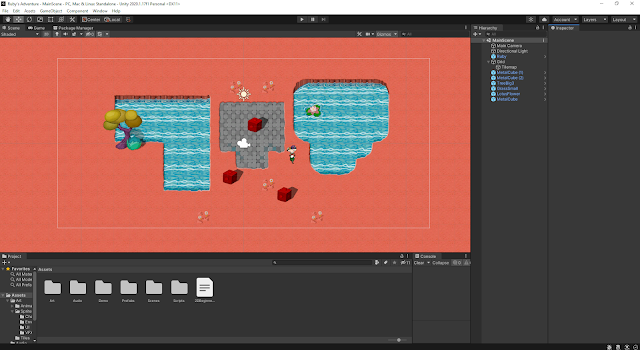
(image of my game in unity) This week for my unity tutorials I had a bit of extra work since I kinda slacked on my work last week so this week I had to catch up 😓 but overall I found the tutorials quite easy to start and go through and it was fun exploring the 2d side of Unity. I remember being interested in sprites and this type of game style a few years ago so I'm excited to learn how these game types are made and how to make my own.  Some of the things I've done so far are include setting up the unity editor to work in making a 2d game. I then went ahead and made my first character and script, character controller and keyboard input and then also worked on the world design, specifically the tile maps which i had to read over twice to get how to paint them on the map 😴 but I managed in the end.  Then I went on to decorate the world with more sprites and set colliders so that the character can interact and be blocked by certain objects.

Unity Tutorial 08

Image
(image describing lesson 4.4,  source ) This week for our Unity Tutorials, I completed lesson 4.4. and had a shot at Challenge 4 In lesson 4.4 I started off by writing a for-loop to spawn 3 enemies as to challenge the player more and also gave it a parameter so that the number of enemies can increase as game goes on. I then wrote up some code to destroy enemies when they fall off and spawn a new wave once a wave is destroyed. I then increased the enemyCount so that the amount of enemies increase with each wave. To finalize the game I spawned powerups with each new wave to help the player. For challenge 4 I was given broken code for a game where the player controls a ball and has to get other balls in your net. Here are the problems with the code which I had to fix: - Hitting an enemy sends it back towards you - A new wave spawns when the player gets a powerup - The powerup never goes away - 2 enemies are spawned in every wave - The enemy balls are not movin...

Unity Tutorial 07

Image
(image showing Unit 4 - Gameplay Mechanics tutorial details,  source )   In this weeks unity tutorial I started the Unit 4 tutorials where we go over gameplay mechanics and make an arcade style sumo battle where the player has to knock enemies off a floating island. In lesson 4.1 I first created the project and opened the scene. I then set up the player and added a texture to the player. I then created a focal point for the camera and coded it so that the player can rotate the focal point of the camera. I then gave the player a forward and backward force and set it to move in the direction of the focal point.  In lesson 4.2 I added an enemy and gave it a physics material to make it bounce away. I then created a script so that the enemy will follow the player. I then also made a spawn manager for the enemies and set their span point randomly.  In lesson 4.3 I chose and prepared a powerup for the player. I set it so that the powerup gets destroyed on collision with the...

Unity Tutorial 06

Image
  (image of lesson 3.4 on my unity editor) For my Unity tutorials this week I completed lesson 3.4 and also tried challenge 3. I was quite happy with this weeks tutorials and learned a few interesting things. For lesson 3.4 I learned how to add particles and sound effects. I first added an explosion particle for when the player collides with an object and also customized the particle. I then added a dirt splatter particle for when the player runs and also got it to play only when the player is on the ground and stop when he jumps or dies. I then added some music in the background and also declared variables for Audio clips for my sound effects. I then added sound effects for when the player jumps and also when the player collides with an object to add to the explosion effect. With all those steps completed I was finally finished this game too! For Challenge 3 had to fix a game with similar components to the lessons. The problems with this game where that:      The pl...

Unity Tutorial 05

Image
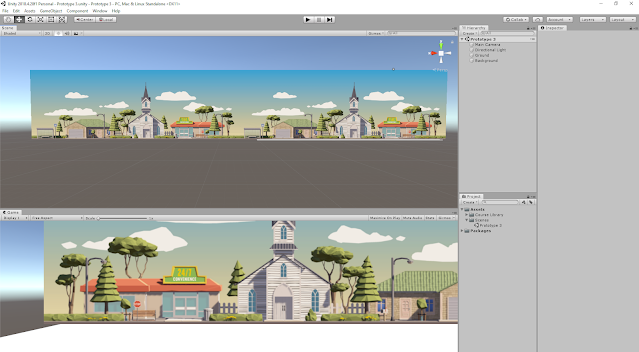
  (image of my unity editor at the start of lesson 3) This week for my unity tutorials I started and completed lesson 3.1, 3.2 and 3.3. In these lessons I started to create a new game. I found them to be fun tutorials and enjoyed completing them and learning new things. In lesson 3.1 I was introduced to the game and what I would accomplish by the end. I created a new prototype folder in my create with code folder and got started. I chose and set up my character giving it a rigid body and a box collider while also making a player control script. I then made the character jump at the start and whenever the player presses spacebar. I then tweaked the jump force and gravity to make the jump look better and more realistic. I also added a condition to stop the player from double jumping. I then made an obstacle and a spawn manager to spawn them at random intervals. In lesson 3.2 I learned how to make the world zoom/whiz by. I first created a script to repeat the background and then I res...

Unity Tutorial 04

Image
  (image of my unity editor during lesson 2) This week for our Unity tutorials I completed my second lesson and finished the game where we have to feed the animals food. Overall I found it to be quite fun and really enjoyed it and also learned some new things. I also attempted the second challenge and completed the main parts required but didn't attempt the extra parts this time around. For lesson 2.4 I learned all about Collision Decisions to make the players food collide with the animals and feed them. To do this I learned how to create a custom method/function. I used InvokeRepeating() to repeat some of the code. I added colliding boxes to the animals and pizza and set them as triggers. I also learned how to override functions and also added a Log Debug message to the console so I know when the game is over.  For the challenge we were given a game that wasn't working properly where the player sent out a dog to catch a random ball that was falling. The first issue was that t...

Unity Tutorial 03

Image
(image of my game in unity, screenshot from my pc)  This week in our Unity Tutorials we started a new tutorial to build and create a top-down view game with the objective of throwing food to hungry animals who are running your way. It is a different style to the previous game we created and I have enjoyed learning and creating from lesson 2.1 to 2.3. In the first lesson we created our new Prototype 2 project and we went over player positioning. I added the player, 3 animals and a slice of pizza to feed them (although I don't know how much these wild animals like pizza 🍕). Then I made the player move left and right using the arrow keys and also added a boundary so that the player doesn't leave the scene. In the second lesson I learned and created a function for the pizza to be launched as a projectile from the player. To do this I first made a script that can move the pizza forward at a fast speed. I then created it into a prefab so that later on it can keep making copies of it...

Unity Tutorial 02

Image
  (image of unity challenge 1 project, screenshot from my own unity) This week in the Unity tutorials I went over lesson 1.4 to finish off my first unity project and then I was issued a challenge. In lesson 1.4 I learned how to move the vehicle left and right using the arrow or AD keys. I then learned how to change the vehicle's speed so that it can go forward or backwards using the arrow or WS keys. I then learned how to further improve the vehicles left and right movements by making it rotate in those directions and not simply slide. I then cleaned up my code and hierarchy so that it is easy to read and more organized. With that i was finished my first project of moving a vehicle down a path with obstacles in the way. I found this project to be very interesting and fun and it was not to hard to complete either. I like how Unity has features to help us create games easier like how I was able to get my inputs for horizontal and vertical without coding it from scratch. I then went a...

Unity Tutorial 01

Image
 This week I completed my first Unity Tutorials. I had gone through the introduction and lessons 1.1 to 1.3. In lesson 1.1 I was introduced to setting up the project folder with all its assets and i learned how to add these assets to Unity and access them. I also went over how to add objects to the scene, where I proceeded to add a vehicle and an obstacle. Next I learned how to  move the camera around and I repositioned it behind the vehicle. I found the very first lesson to be pretty easy and simple and it was a great way to introduce me to Unity. In lesson 1.2 I was introduced to creating my first script and working with C#. I followed the tutorial as it showed me how to make the vehicle move forward, change its speed, make the vehicle and obstacles interact with each other and also how to duplicate the obstacles to make more. I found this lesson to be quite easy too and found the coding simple and logical. One thing that certainly helped is the fact that I had previously le...